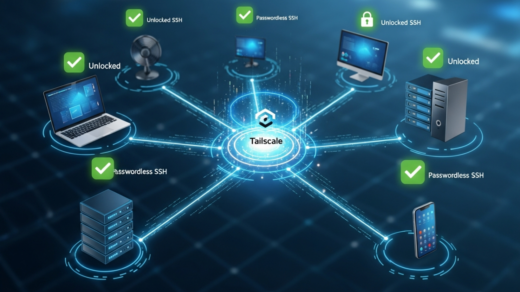
Want your own private, S3-compatible object storage accessible securely from anywhere? Running MinIO on an always-on Mac Mini combined with Docker and Tailscale is a fantastic solution. This post walks you through setting it up, including navigating a common hurdle when using external drives on macOS with Docker Compose.
What We’ll Achieve:
- Install MinIO using Docker Compose on a Mac Mini.
- Store MinIO data reliably on an external drive.
- Make the MinIO instance securely accessible only to devices on your private Tailscale network.
- Access the MinIO API and Console using a stable Tailscale machine name.
Prerequisites:
- Mac Mini: An always-on Mac Mini (Apple Silicon or Intel) works great.
- macOS: Monterey (12) or later recommended.
- Docker Desktop for Mac: Installed and running. Download here.
- External Hard Drive: Formatted with APFS (preferred) or Mac OS Extended (Journaled). This is where MinIO’s data will live.
- Tailscale Account: A free Tailscale account.
- Tailscale Installed: Tailscale installed and logged in on the Mac Mini and any client devices that need access to MinIO.
Step 1: Grant Docker Full Disk Access
Docker needs permission to access different parts of your system, especially external drives.
- Go to System Preferences > Security & Privacy > Privacy.
- Select Full Disk Access from the list on the left.
- Click the padlock icon at the bottom left and enter your password to make changes.
- Click the + button.
- Navigate to your Applications folder and select Docker.app.
- Click Open.
- Ensure the checkbox next to Docker is checked.
- Important: Quit and restart Docker Desktop completely after making this change.
Step 2: The Challenge – Docker Compose and External Drives on macOS
Our goal is to define the MinIO service using a docker-compose.yml file for easy management. The natural first approach is to directly map a volume from the external drive:
# --- Initial (Potentially Problematic) Approach ---
services:
  minio:
    # ... other settings ...
    volumes:
      - /Volumes/<ExternalDriveName>/<MinioDataFolder>:/data
    # ... other settings ...
However, a frustrating quirk can occur on macOS: Docker Desktop sometimes struggles to consistently recognize or allow access to paths on external drives when they are added via its GUI settings (Settings > Resources > File Sharing) or when referenced by Docker Compose if Docker Desktop thinks it needs explicit permission via that GUI.
We even tried a common workaround: creating a symbolic link from the home directory (ln -s /Volumes/<ExternalDriveName>/<MinioDataFolder> ~/docker_shares/minio_link) and adding ~/docker_shares to Docker Desktop’s File Sharing list. While the path saved in the settings, attempting to run docker compose up resulted in a “Shared folder invalid … ~/docker_shares” error, indicating Docker Desktop itself couldn’t validate that shared path configuration for Compose.
Step 3: The Breakthrough – Direct Mounts & docker run
The key insight came from testing a simple docker run command:
docker run -d \
   --name minio-test \
   -p 9000:9000 \
   -p 9091:9090 \
   -v /Volumes/<ExternalDriveName>/<MinioDataFolder>:/data \
   # ... other flags ...
   minio/minio server /data --console-address ":9090"
This command, using a direct volume mount (-v) to the external drive path, worked perfectly!
This proved:
- Full Disk Access was sufficient for the Docker Engine itself to access the external drive path.
- The issue wasn’t a fundamental inability to mount the drive, but rather how Docker Desktop’s configuration layer (and its interaction with Compose) handled certain path types or explicit shares.
Step 4: The Working Docker Compose File
Armed with the knowledge that a direct mount works, we can now confidently create our docker-compose.yml file, mirroring the successful docker run approach and bypassing the problematic File Sharing GUI validation step for this volume.
Create a file named docker-compose.yml in a dedicated folder (e.g., ~/minio-compose):
# ~/minio-compose/docker-compose.yml

services:
  minio:
    image: minio/minio:latest
    container_name: minio-server
    ports:
      # Replace HOST_API_PORT if 9000 is taken on your Mac Mini
      - "<HOST_API_PORT>:9000" # e.g., "9000:9000"
      # Replace HOST_CONSOLE_PORT if 9091 is taken on your Mac Mini
      - "<HOST_CONSOLE_PORT>:9090" # e.g., "9091:9090"
    volumes:
      # CRITICAL: Use the DIRECT path to your external drive folder.
      # Replace <ExternalDriveName> and <MinioDataFolder>!
      - /Volumes/<ExternalDriveName>/<MinioDataFolder>:/data
    environment:
      # CHANGE THESE! Use strong credentials. Consider .env file or Docker secrets.
      MINIO_ROOT_USER: <YourAccessKey>
      MINIO_ROOT_PASSWORD: <YourSecretKey>
    # Tells MinIO where the data volume is and where the console should listen inside the container
    command: server /data --console-address ":9090"
    healthcheck:
      test: ["CMD", "curl", "-f", "http://localhost:9000/minio/health/live"]
      interval: 30s
      timeout: 20s
      retries: 3
    # Ensures MinIO restarts automatically if it stops or on system reboot
    restart: unless-stopped
Before running, make sure you:
- Replace <ExternalDriveName> with the actual name of your external drive (e.g., HECTORSSD).
- Replace <MinioDataFolder> with the actual folder name you created on the drive for MinIO (e.g., minio_data). Ensure this folder exists!
- Replace <HOST_API_PORT> and <HOST_CONSOLE_PORT> with the ports you want to use on your Mac Mini (e.g., 9000 and 9091 are common defaults).
- Replace <YourAccessKey> and <YourSecretKey> with your desired secure credentials.
(Optional Cleanup): If you previously tried the symlink workaround, go into Docker Desktop Settings > Resources > File Sharing and remove the entry for ~/docker_shares to avoid confusion. Apply & Restart Docker.
Step 5: Launch MinIO
- Open Terminal on your Mac Mini.
- Navigate to the directory where you saved docker-compose.yml:
cd ~/minio-compose
3. Start the MinIO container in detached mode:
docker compose up -d
4. Verify it’s running:
docker ps
- You should see minio-server listed with status Up… (healthy).
- Test local console access in your browser: http://localhost:<HOST_CONSOLE_PORT> (e.g., http://localhost:9091). Log in with the credentials you set.
Step 6: Tailscale Integration
- Ensure Tailscale is installed, running, and logged in on your Mac Mini and any client devices.
- Enable MagicDNS in your Tailscale Admin Console settings (usually enabled by default). This lets you use machine names instead of IP addresses.
- Find your Mac Mini’s Tailscale machine name (e.g., in the Tailscale app menu or admin console – let’s assume it’s macmini).
Step 7: Accessing MinIO via Tailscale
No changes are needed in the docker-compose.yml file! Docker, by default, makes the exposed host ports available on all network interfaces, including the one Tailscale creates.
From any other device logged into your Tailscale network:
- Access the Console: Open a web browser and go to http://macmini:<HOST_CONSOLE_PORT> (e.g., http://macmini:9091).
- Access the API: Configure your S3 clients (like n8n, AWS CLI, SDKs) to use the following endpoint: http://macmini:<HOST_API_PORT> (e.g., http://macmini:9000).
Example: Connecting n8n
- In n8n, add an “AWS” credential.
- Use Authentication Method “AWS Access Key”.
- Enter your MinIO Access Key (<YourAccessKey>) and Secret Key (<YourSecretKey>).
- Crucially: Under advanced options, set the Endpoint to http://macmini:<HOST_API_PORT>.
- Set a placeholder Region, like us-east-1.
- Ensure SSL is disabled.
- Save the credential and use it in your n8n AWS S3 nodes.
Troubleshooting
- Connection Refused: Double-check the host port numbers used in your URLs match those in the ports section of docker-compose.yml. Verify the container is running (docker ps). Check the macOS Firewall isn’t blocking the ports.
- Cannot Resolve macmini: Ensure MagicDNS is enabled and Tailscale is running on both client and server. Check Tailscale ACLs in the admin console (though defaults usually allow all internal traffic).
Conclusion
You now have a robust, private S3-compatible object store running on your Mac Mini, reliably using an external drive, and securely accessible from anywhere via your Tailscale network. By understanding the nuances of Docker volume mounting on macOS and leveraging the direct mount method confirmed by docker run, we achieved a stable setup using Docker Compose. Enjoy your private cloud storage!
Table of Contents
- Step 1: Grant Docker Full Disk Access
- Step 2: The Challenge – Docker Compose and External Drives on macOS
- Step 3: The Breakthrough – Direct Mounts & docker run
- Step 4: The Working Docker Compose File
- Step 5: Launch MinIO
- Step 6: Tailscale Integration
- Step 7: Accessing MinIO via Tailscale
- Troubleshooting
- Conclusion


