This guide provides step-by-step instructions to install a self-hosted QuickChart instance on an ARM-based server (like Oracle Cloud Ampere A1) running Ubuntu 24.04, using Docker Compose and Caddy.
We will build the Docker image locally from the official source code. This approach ensures compatibility with the ARM64 architecture and bypasses potential issues with pre-built multi-architecture images available on Docker Hub.
Goal: Run QuickChart accessible at https://chart.yourdomain.com.
Prerequisites:
- An ARM-based server (e.g., Oracle Cloud ARM VM).
- Ubuntu 24.04 LTS (or similar Debian-based distro).
- Root or sudo access.
- Docker and Docker Compose installed.
- Caddy v2 installed and configured as a reverse proxy.
- git installed (sudo apt update && sudo apt install git -y).
- Access to your domain’s DNS settings (e.g., Cloudflare).
Table of Contents
- Step 1: Get the QuickChart Source Code
- Step 2: Configure Docker Compose for Local Build
- Step 3: Build and Run the Container
- Step 4: Configure Caddy Reverse Proxy
- Step 5: Configure DNS (Cloudflare Example)
- Step 6: Test Your Self-Hosted QuickChart
- Conclusion
Step 1: Get the QuickChart Source Code
Clone the official QuickChart repository to obtain the Dockerfile needed for the build. Choose a suitable location, like /mnt/myvolume if you have a separate volume, or /opt.
# Navigate to your chosen parent directory
# cd /mnt/myvolume
# or
# cd /opt

# Clone the repository
sudo git clone https://github.com/typpo/quickchart.git

# Navigate into the cloned directory
cd quickchart
Step 2: Configure Docker Compose for Local Build
Inside the cloned quickchart directory, create a docker-compose.yml file. This file tells Docker Compose how to build and run the service.
# Make sure you are in the 'quickchart' directory cloned in Step 1
sudo nano docker-compose.yml
Paste the following configuration:
version: '3.7'

services:
  quickchart:
    # --- Build Configuration ---
    build:
      context: .  # Build using the Dockerfile in the current directory (.)
      # platform: linux/arm64 # Usually not needed, Docker detects host arch
    # --- End Build Configuration ---

    container_name: quickchart_local_build # A descriptive name
    ports:
      # Map container port 3000 to host port 3400 (localhost ONLY)
      # Caddy will connect to localhost:3400
      - "127.0.0.1:3400:3000"
    environment:
      # Port QuickChart listens on *inside* the container
      - PORT=3000
      # Recommended for production
      - NODE_ENV=production
      # Might still be necessary on ARM/restricted environments
      - DISABLE_SANDBOX=true
    # Restart automatically unless manually stopped
    restart: unless-stopped

networks:
  default:
    name: quickchart_local_network # Optional network name
Key points:
- build: context: .: Tells Compose to find the Dockerfile here and build the image, rather than pulling one.
- ports: – “127.0.0.1:3400:3000”: Makes the container accessible only from the host machine itself on port 3400. Caddy will proxy requests to this.
Save and close the file (Ctrl+X, Y, Enter).
Step 3: Build and Run the Container
Now, instruct Docker Compose to build the image and start the service in the background (-d).
# Ensure you are still in the 'quickchart' directory
sudo docker compose up --build -d
This command will:
- Read the Dockerfile.
- Download base images and dependencies.
- Compile/build the QuickChart application within a Docker image specifically for your ARM64 architecture. (This may take several minutes the first time).
- Start the container using the built image.
Verify the container is running:
# Check running containers
sudo docker ps

# You should see 'quickchart_local_build' with Status 'Up'

# Check the logs for startup messages (optional)
sudo docker compose logs -f
# Look for "Listening on port 3000". Press Ctrl+C to exit.
Step 4: Configure Caddy Reverse Proxy
Edit your main Caddy configuration file (usually /etc/caddy/Caddyfile) to add an entry for QuickChart.
sudo nano /etc/caddy/Caddyfile
Add a block for your desired subdomain, pointing to the port QuickChart is listening on (localhost:3400):
# ... other site configurations ...

chart.yourdomain.com {
        # Optional: Log requests for this specific site
        log {
                output file /var/log/caddy/chart.yourdomain.com.log
        }

        # Enable response compression
        encode zstd gzip

        # Forward requests to the QuickChart container running on port 3400
        reverse_proxy localhost:3400
}

# ... potentially more site configurations ...
Save the file and reload Caddy’s configuration to apply the changes:
sudo systemctl reload caddy
Step 5: Configure DNS (Cloudflare Example)
Point your subdomain chart.yourdomain.com to your server’s public IP address.
- Log in to Cloudflare and select yourdomain.com.
- Go to DNS -> Records.
- Add an A record:
- Type: A
- Name: chart
- IPv4 address: Your server’s Public IP (xxx.xxx.xxx.xxx).
- Proxy status: Proxied (Orange Cloud).
- Go to SSL/TLS -> Overview. Ensure the mode is Full or Full (Strict).
Step 6: Test Your Self-Hosted QuickChart
Open your browser and navigate to https://chart.yourdomain.com.
You should see the QuickChart service page or documentation. To test chart generation, use a URL like this:
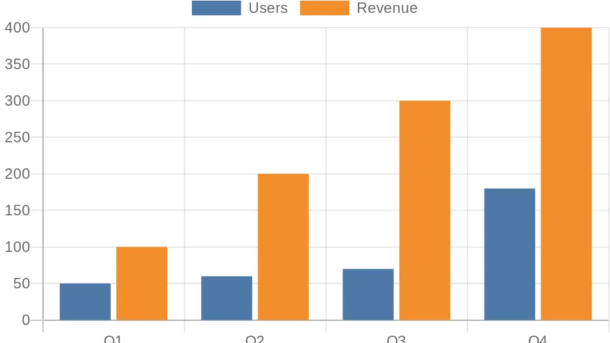
This should display a bar chart image generated by your server!
A Note on Troubleshooting Pre-built Images
During the initial setup attempts using the documented pre-built Docker Hub image (ianw/quickchart:latest), significant issues were encountered. The primary problem was that the latest tag did not reliably resolve to the required linux/arm64 architecture variant on the ARM server. It often defaulted to pulling the linux/amd64 image, resulting in exec format error when trying to run the container. Attempts to force the platform or pull specific image digests also failed due to apparent inconsistencies in the upstream image manifest or Docker’s local caching behaviour.
Building the image locally from the source code provided in the official GitHub repository proved to be the definitive solution, ensuring correct architecture compatibility and bypassing the problems related to the pre-built image distribution.
Conclusion
By building the Docker image locally, you’ve successfully deployed a QuickChart instance tailored for your ARM server architecture. This method provides a reliable way to self-host QuickChart when pre-built images present challenges, giving you full control over your chart generation service via a clean Caddy reverse proxy setup.